English
 Español
By the time I got to the walls, most of my renovation budget was already gone. The kitchen went over, the bathroom needed extra waterproofing, and the electrical work ended up with more circuits than planned. For the walls, I had about $3,000 left (converted roughly from the original budget for a three-bedroom apartment).
That money had to cover over a hundred square meters of wall. Hiring painters alone would have blown the budget.
I made a table comparing wallpaper, latex paint, and PS wall panels. Not to find the “best” material, but to find the one that fit me best at that moment.
Here’s what I considered.
Step 1: Crunch the numbers
| Material | Material cost (100㎡) | Labor | Total | Notes |
| Latex paint | $300–600 | $450–750 | $750–1,350 | Includes putty, primer, paint, labor |
| Wallpaper | $450–1,200 | $300–600 | $750–1,800 | Glue extra, requires very smooth walls |
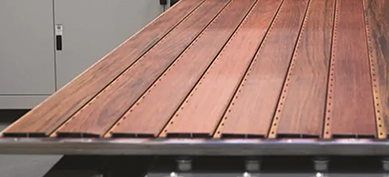
| PS panels | $450–750 | $0 (DIY) | $450–750 | Includes adhesive and basic tools |
My total remaining budget was around $3,000, but I only wanted to spend about $1,500 on the walls and keep the rest for furniture.
Latex paint and wallpaper, including labor, would easily exceed $1,500. PS panels with DIY installation came in under $750. The difference was enough to buy a good mattress.
Step 2: Consider the time I had
I work a regular job. Weekends were my only free time.
- Latex paint: Wall preparation (scraping old paint, applying putty, sanding) takes at least a week. Then you wait for coats to dry. I couldn’t do it myself – I would have to hire someone, take time off to supervise, and coordinate schedules.
- Wallpaper: Same wall preparation, plus a professional installer. Wallpaper requires even smoother walls than paint.
- PS panels: As long as the wall is reasonably clean and flat, I could finish one wall in half a day. No waiting, no supervising, no taking time off work.
By the time I got to the walls, I had only one week left before I needed to move in. PS panels were the only option I could actually finish.
Step 3: Think about the worst-case scenario
I’m the type of person who second-guesses decisions. So I imagined the worst outcome for each choice.
- Latex paint: Worst case – uneven finish, cracks. Needs repainting in 5 years. Then I’d have to move furniture and air out the room again.
- Wallpaper: Worst case – edges lift from humidity, seams darken. Needs replacement in 3–4 years. Removing old wallpaper is messier than repainting.
- PS panels: Worst case – crooked installation, edges lift, or I don’t like the color. Crooked can be peeled and redone within 20 minutes. Lifted edges can be re glued. If I get tired of the color in a few years, replacing the panels isn’t expensive.
Even if PS panels failed, the loss would be small. With the other two, a failed job would mean hundreds (or thousands) of dollars wasted.
What I decided – and how it worked out after two years
I chose PS panels. Here’s what happened:
- Money: About $600 for materials. DIY labor: $0. The money I saved bought me a very nice bed.
- Time: Two weekends to finish the living room and master bedroom (I left the other two rooms painted). I didn’t miss any work.
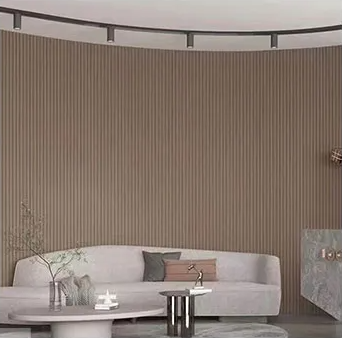
- Look: Not as premium as solid wood, but way better than plain white walls. Friends who came over said, “That wood-grain wall looks great.”
- Regrets: One panel is about 2mm off-level. You don’t notice unless you look closely, but every time I walk past that wall I see it. Next time I’ll spend more time leveling.
If I had to do it again, I would still choose PS panels. Not because they are perfect, but because they were the right fit for me at that time.

Questions you might ask
Q1: You only did the living room and master bedroom. What about the other rooms?
The other two rooms got latex paint. Doing the whole house in PS panels would have exceeded my budget. Covering the main areas and painting the rest saves money and adds visual contrast.
Q2: Was it tiring to install yourself?
Yes. Cutting panels and climbing up and down alone was hard work. But every time I got tired, I remembered how much I was saving on labor, and that kept me going.
Q3: After two years, any problems with the panels?
No lifting, no fading, no mold. The only issue: my kid stuck a sticker on a panel and left some residue when I peeled it off. Rubbing alcohol took it off.
Q4: You said “right fit for me at that time.” What would you choose now?
Now I have a bit more budget. I might consider solid wood paneling. But solid wood requires professional installation and regular maintenance – not necessarily more worry-free. I’d probably still choose PS panels.
Q5: Which brand did you buy? How much per square meter?
The store you’re looking at now. Prices vary by thickness and pattern. Contact customer service. I bought the most basic type at a standard price.
Q6: One sentence for someone who is still undecided?
If you have a tight budget, limited time, and are willing to do DIY, choose PS panels. If you’re missing one of those three, think twice.