

 English
 Español
Old House Renovation: Why PS Wall Panels Were My First Choice
I've lived in my old house for over ten years, and the walls are completely worn out. Yellowed, peeling, cracked, covered in kids' drawings… I wanted to renovate, but the thought of scraping off old paint, applying putty, sanding, and repainting – a two-week project that would turn the house into a disaster zone – made me put it off.
Then a friend who works in renovation told me: "For your situation, PS wall panels are the easiest solution."
I was skeptical, but I gave them a try. The result? I finished renovating the living room and bedroom walls in just three days. The house barely got messy, and we didn't have to move out.
If you also live in an old house and want to renovate without the headache, these experiences should help.
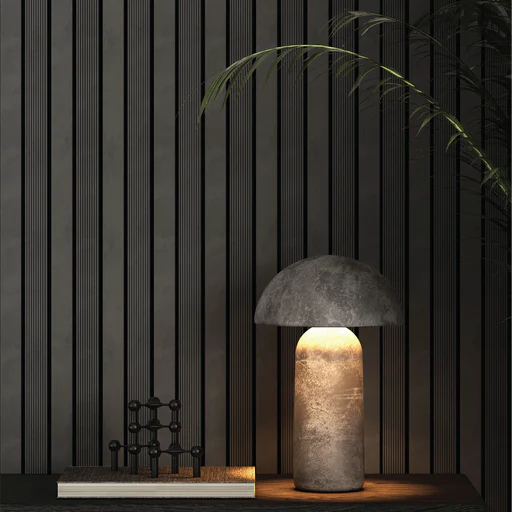
Three biggest headaches of old house renovation – and how PS panels solve them
Headache 1: Do I have to remove the old wall surface?
Traditional renovation means you must scrape off the old paint, reapply putty, and wait for it to dry. It's messy, noisy, and takes at least a week.
With PS panels, you don't need to remove the old surface. As long as the old wall isn't large area hollow or falling off, you can stick the panels directly over it. The panels cover everything – yellowing, cracks, old marks – completely hidden.
Headache 2: The house is occupied – we can't just move out
Scraping and painting fills the house with dust and fumes. Elderly family members and kids would need to stay in a hotel. Installing PS panels creates no dust and has no strong smell. You can live in the house while you work – eating, sleeping, going about your day – completely unaffected.
Headache 3: Tight budget
Old house renovations don't need to cost a fortune. PS panels are affordable, and if you install them yourself, you save on labor. Spend a little, and give your old house a completely new look.
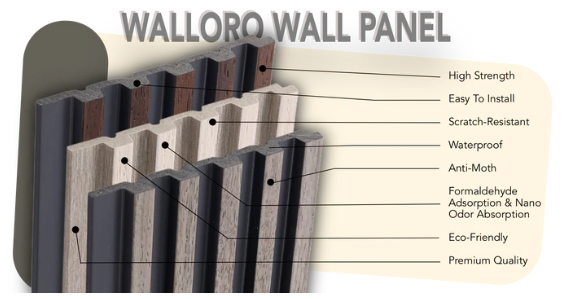
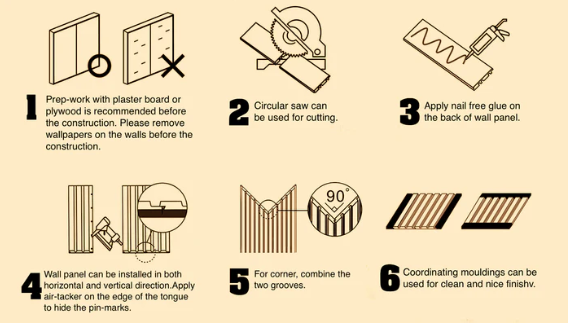
What preparation is needed before installing?
Very simple – three things:
- Check the wall– Tap on it. If there are no large hollow spots (where the sound echoes), you're good. Small cracks and nail holes can be filled with patching compound.
- Clean the wall– Wipe the wall with a damp cloth to remove dust and grease. Let it dry.
- Buy panels and adhesive– Order enough panels (add 10% for waste) and a few tubes of neutral silicone adhesive.
That's it. No sanding, no primer, no leveling required.
What did the old house look like after installation?
I chose a light grey wood grain, matte finish. The yellowed, peeling walls became a clean, textured feature wall. A neighbor came over and thought I'd hired someone and spent a lot of money.
The best part? The whole project took only two afternoons. First day: living room. Second day: bedroom. We cooked dinner and watched TV as usual – no disruption at all.
After more than a year, has anything gone wrong?
No lifting edges, no mold, no fading (the room faces north).
The only thing to watch out for: if your old house has moisture problems (like water leaking through the exterior wall or poor window seals), fix those first before installing the panels. PS panels themselves are waterproof, but if water seeps through the wall from behind, it will eventually push the panels off the wall.
Also, make sure the wall is thoroughly cleaned before installing. Old houses accumulate dust and grease for a decade – if you don't clean it off, the adhesive won't hold.
Which old houses are especially suitable for PS panels?
- Walls are old but not falling apart– yellowed, small cracks, kids' drawings – just cover them up.
- Rental property renovation– low cost, short construction period, no lost rental income.
- Just bought a second-hand home– don't want a major renovation but want to live comfortably.
- Elderly parent's room– no formaldehyde, no need to move out during installation.
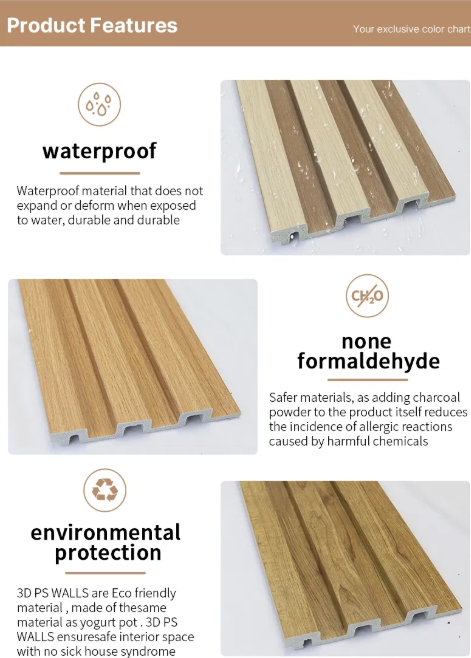
- Damp first floor or basement– PS panels are waterproof and moisture-resistant, far more durable than latex paint or wallpaper
One small reminder
PS panels are great for "old house refresh," but not ideal for "old house major repair." If your walls have large hollow areas, peeling down to the brick, or active water leaks and mold, hire someone to fix the basic structure first. Panels are the surface – the substrate is the foundation. If the foundation is rotten, the surface won't hold.
Frequently Asked Questions (FAQ)
Q1: Where is your factory located?
A: No. 10-1 Lianhong Road, Yuanhua Town, Haining City, Zhejiang Province, China.
Q2: There's wallpaper on the old wall. Do I need to remove it?
Yes. Wallpaper can develop mold when damp, and adhesive won't stick well to it. Remove the wallpaper, clean off the remaining glue, then install the PS panels.
Q3: The wall has some uneven spots. Can I install directly over them?
If the height difference is within 2–3mm, the neutral silicone can fill the gaps. If the unevenness is more than 5mm, use patching compound to level it first. Otherwise, thin panels will follow every dip and bump.
Q4: My old house has walls with no waterproofing (like old brick walls). Can I install PS panels?
If the wall itself does not leak, it's fine. If there is moisture penetration (e.g., the wall feels damp after rain), you must treat the waterproofing first. Otherwise, moisture will accumulate behind the panels and cause mold.
Q5: If I install it myself, how do I reach the upper part of high walls?
Buy a small rolling scaffold (a few hundred dollars) or rent one. Alternatively, you can install panels only on the lower half (up to 1.2 meters high) and paint the upper half with latex paint – it saves money and adds visual depth.
Q6: Can your panels be used in the kitchen and bathroom of an old house?
Behind the kitchen cooktop, yes (keep some distance from the flame). In the bathroom, the dry area behind the vanity – yes. Inside the shower area – not recommended. Old houses already have poor waterproofing, and direct water spray increases the risk.