English
 Español
How to Make a Wood Panel Wall for 3D Effects
To make a wood panel wall with a 3D effect, you need to plan your pattern, prepare your wall surface, cut or source your panels, and install them in a layered or geometric arrangement that creates depth and shadow. The key to a convincing 3D look lies in the combination of dimensional panel profiles, precise spacing, and strategic lighting. Whether you are using real timber, MDF, or modern 3D Wood Wall Panels, the process follows the same fundamental steps outlined below.
What Makes a Wall Panel Look "3D"
A 3D wall panel achieves its dimensional appearance through raised geometry, recessed grooves, and the interplay of light and shadow. Unlike flat painted walls, 3D panels use physical depth — typically ranging from 10mm to 50mm — to create visual texture. Common 3D profiles include:
- Wave or ripple patterns with curved peaks and valleys
- Diamond or rhombus grids for a geometric look
- Stacked horizontal or vertical slat arrangements
- Honeycomb or hexagonal tiles
- Abstract sculptural reliefs with irregular depths
The shadow line produced when light hits raised surfaces is what gives 3D panels their dramatic visual impact. Even a 15mm depth difference can produce a striking shadow contrast in well-lit rooms.
Tools and Materials You Will Need
Before starting installation, gather all required tools and materials to avoid interruptions. The exact list varies based on your chosen panel type, but the essentials are consistent across most projects.
Core Materials
- 3D wood or wood-look wall panels (real timber, MDF, or PVC composite)
- Adhesive construction glue (e.g., grab adhesive rated for the panel material)
- Finishing nails or panel clips (for mechanical fastening)
- Wood filler or caulk for gaps and edges
- Primer and paint or wood stain (if panels are unfinished)
- Furring strips or battens (for uneven walls or added ventilation)
Tools Required
- Tape measure and pencil
- Level (spirit level or laser level)
- Circular saw, miter saw, or jigsaw for cutting panels
- Drill and drill bits
- Caulk gun for adhesive application
- Sanding block or orbital sander
- Safety goggles and dust mask
Step-by-Step: How to Install a 3D Wood Panel Wall
Step 1 — Plan and Measure Your Wall
Measure the total wall area in square feet or square meters. Account for doors, windows, and outlets. Add 10–15% extra material to your order to cover cutting waste, pattern matching, and future repairs. Sketch your layout on paper or use a free room planner tool to visualize pattern direction before committing.
Step 2 — Prepare the Wall Surface
The wall must be clean, dry, and structurally sound. Remove any old wallpaper, loose paint, or debris. Fill cracks with wall filler and sand smooth once dry. For masonry or brick walls, apply a coat of primer-sealer. A flat, stable substrate is critical — any imperfection behind the panels will telegraph through the finished surface, especially with thinner panel profiles.
Step 3 — Mark a Level Starting Line
Use a laser level or spirit level to draw a perfectly horizontal reference line across the wall. Starting from a plumb, level line ensures all subsequent rows remain aligned. Most installers begin at the center of the wall and work outward, or from the most visible corner to prevent awkward cuts near eye-level focal points.
Step 4 — Install Furring Strips (If Required)
If your wall is uneven or you are installing on masonry, attach horizontal furring strips (typically 25mm × 50mm timber battens) at intervals of 400–600mm. This creates a flat mounting plane and allows air circulation behind the panels, which is particularly important for real wood panels in humid environments such as bathrooms or kitchens.
Step 5 — Apply Adhesive and Position First Panel
Apply construction adhesive to the back of the panel in a zigzag or dot pattern — typically using one tube of adhesive per 1–2 square meters of coverage depending on the product specifications. Press the panel firmly against the wall, aligning it with your reference line. Hold or prop it in place for the time recommended by the adhesive manufacturer (usually 30–60 seconds initial set).
Step 6 — Continue Installation Row by Row
Work across the wall systematically. For interlocking panels, ensure tongue-and-groove or clip edges engage fully before pressing to the wall. For stacked slat designs, maintain consistent spacing using spacers. Stagger joints between rows by at least 30% of the panel length to avoid continuous vertical seams, which weaken the visual effect and structural integrity.
Step 7 — Cut Panels for Edges and Obstacles
Measure and mark cuts carefully before sawing. For straight cuts, use a circular saw with a fine-tooth blade. For curves around outlets or pipes, use a jigsaw. Always cut face-down when using a circular saw to minimize tear-out on the visible surface. Test-fit each cut piece before applying adhesive.
Step 8 — Secure with Mechanical Fasteners
For heavier panels or high-traffic areas, supplement adhesive with finishing nails or panel screws at each furring strip location. Countersink screws and fill holes with wood filler. On lighter panels, adhesive alone is often sufficient when the substrate is properly prepared.
Step 9 — Finish Edges and Seams
Apply paintable caulk to all perimeter edges and any gaps between panels. Smooth with a damp finger for a clean bead. For raw wood panels, sand lightly with 180-grit sandpaper before applying stain, paint, or sealant. Edge trim profiles (available in matching materials) give corners and borders a polished, professional finish.
Step 10 — Apply Final Finish and Plan Lighting
If panels are unfinished, apply your chosen stain or paint in even coats, allowing full drying between coats. For maximum 3D effect, install directional lighting such as recessed spotlights or LED strip lighting at an angle to the panel surface. Side-lighting at 30–45 degrees maximizes shadow depth and dramatically enhances the three-dimensional appearance.
Choosing the Right Panel Material for Your Project
The material you choose affects installation method, durability, cost, and the final aesthetic. The table below summarizes the most common options for 3D wood panel walls:
| Material | Typical Depth Range | Best For | Moisture Resistance | Relative Cost |
|---|---|---|---|---|
| Solid Hardwood | 15–50mm | Living rooms, luxury spaces | Low (needs sealing) | High |
| MDF (Medium Density Fibreboard) | 10–30mm | Painted feature walls, offices | Very Low | Low–Medium |
| Bamboo | 12–25mm | Eco-conscious interiors | Medium | Medium |
| PVC / WPC Composite | 10–30mm | Bathrooms, kitchens, commercial | Very High | Medium |
| Reclaimed Wood Slats | 20–40mm | Rustic, industrial interiors | Variable | Medium–High |
PVC composite and WPC panels are increasingly popular for 3D wall applications because they combine the visual warmth of wood grain with high moisture resistance and dimensional stability — making them suitable for virtually any room in the home without the maintenance demands of real timber.
Popular 3D Wood Panel Wall Patterns and How to Achieve Them
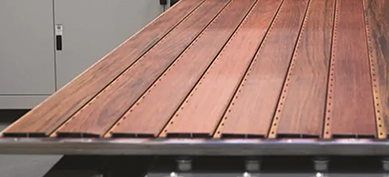
Horizontal Slat Wall
Install equal-width timber battens or pre-made slat panels horizontally across the wall with uniform gaps of 10–20mm between each slat. This is one of the easiest 3D patterns to DIY and is highly effective in bedrooms and living rooms. Mount slats on vertical battens attached to the wall to create depth from the flat surface.
Herringbone or Chevron Pattern
Cut planks at 45-degree angles and install in alternating diagonal directions. This pattern requires more precise cutting and planning but produces a dynamic, high-impact visual. Plan the layout on paper first and mark the wall grid before cutting any material.
Geometric Relief Tiles
Pre-formed 3D tile panels — often in diamond, hexagon, or wave profiles — are installed in a grid pattern like tiles. Many come with interlocking edges for seamless alignment. These are ideal for accent walls and require minimal cutting. Stagger the starting row by half a tile for a more organic, brick-like appearance.
Mixed-Depth Layered Wall
Layer panels of different thicknesses to create a shadow-box effect. For example, mount a base layer of thin planks, then overlay with thicker raised elements at intervals. This technique requires more planning but produces some of the most architecturally striking results, particularly in hallways and staircases where depth can be appreciated from multiple angles.
Common Mistakes to Avoid
- Skipping the reference line: Even small alignment errors compound across a wall and become very visible. Always start with a laser-checked level line.
- Using the wrong adhesive: Standard PVA glue is not suitable for wall panels. Use a grab adhesive rated for the specific panel material and substrate.
- Not acclimating real wood panels: Natural timber should be left in the installation room for 48–72 hours before installation so it adjusts to ambient humidity and temperature, preventing warping or gaps after fitting.
- Ignoring outlets and switches: Plan panel cuts around electrical boxes before installation, not after. Mark outlet positions on panels before cutting.
- Poor lighting planning: Installing 3D panels without considering the final lighting often results in flat-looking walls. Plan light positions alongside panel installation.
- Underordering material: Always order at least 10% more than your calculated area to account for cuts, waste, and pattern matching.
Maintenance and Care for 3D Wood Panel Walls
Once installed, 3D wood panel walls require relatively low maintenance, though the specific care routine depends on the material:
- Real wood panels: Dust regularly with a soft, dry cloth. Apply wood polish or wax every 6–12 months. Re-seal or re-stain every 3–5 years depending on wear.
- MDF panels: Wipe gently with a slightly damp cloth. Avoid prolonged moisture exposure. Touch up paint chips promptly to prevent swelling.
- PVC/WPC composite panels: Clean with a mild detergent and damp cloth. These materials do not require sealing or polishing and are highly resistant to staining.
For all panel types, inspect adhesive bonds annually, especially in rooms with significant temperature fluctuation. Re-glue any panels showing signs of lifting at the edges before they detach fully.
FAQ: 3D Wood Wall Panels
Q1: How much does it cost to install a 3D wood panel wall?
Costs vary widely by material and region. MDF panels typically range from $15–$40 per square meter for materials, while solid hardwood can exceed $100 per square meter. Professional installation adds $20–$60 per square meter on top of material costs. DIY installation significantly reduces the total budget.
Q2: Can I install 3D wood panels over existing tiles or wallpaper?
It is generally not recommended. Tiles create an uneven surface that compromises adhesive bonding, and wallpaper may not support the panel weight. Remove existing coverings and prepare the bare wall surface for best results.
Q3: Are 3D wood wall panels suitable for bathrooms?
Yes, if you choose the right material. PVC composite or WPC panels with a wood-look finish are waterproof and specifically designed for wet areas. Real wood and MDF panels are not suitable for bathrooms unless heavily sealed, and even then are not recommended in shower or high-splash zones.
Q4: How do I cut 3D panels without damaging the textured surface?
Use a fine-tooth saw blade and cut with the decorative face down when using a circular saw (to minimize tear-out on the face). For jigsaw cuts, use a downstroke blade. Tape the cut line with masking tape before sawing to further reduce chipping.
Q5: How long does a DIY 3D wood panel wall installation take?
A single accent wall of approximately 10 square meters typically takes 4–8 hours for an experienced DIYer, including layout, cutting, and installation. First-time installers should budget a full day, allowing time for careful measuring and any adjustments.
Q6: Can 3D wood panels be removed without damaging the wall?
Panels installed with adhesive are generally difficult to remove without some wall surface damage. Using mechanical fasteners (screws or clips) instead of or alongside adhesive allows for cleaner removal. If removability is important, use a clip-and-batten system rather than direct adhesive bonding.
Q7: What is the best room for a 3D wood panel feature wall?
Living rooms and bedrooms are the most popular choices because the panels benefit from controlled lighting and are viewed from a distance where the 3D effect is most pronounced. Entryways and hallways also work very well as high-impact first impressions for visitors.