English
 Español
DIY-Friendly Installation: A Step-by-Step Guide to PS Wall Panels – No Furring Strips, No Putty, One Person Can Do It
We proved that PS wall panels beat most traditional materials in eco-friendliness, waterproofing, durability, aesthetics, and cost-performance. But even the best product won't sell if installation is complicated or requires expensive labor.
Good news: installing PS wall panels is surprisingly easy. You don't need a professional carpenter or tile setter. You don't even need to remove your old walls. This step-by-step guide walks you through the entire process. After reading, you'll understand why we say "one person, one day, one wall" is no joke.

1. Preparation: Tools and Materials
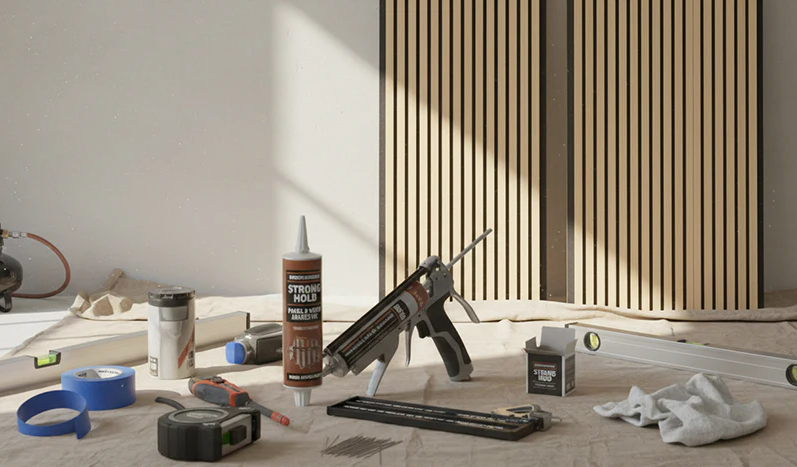
Here's what you'll need – most items are available at any hardware store:
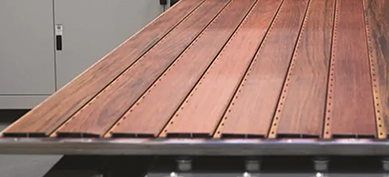
- PS wall panels (add 5% extra for cutting waste)
- Tape measure + straight edge / square
- Utility knife (for cutting panels)
- Level (laser or bubble level both work)
- Nail gun + air compressor (recommended for speed) OR construction adhesive (quieter, DIY-friendly)
- Rubber mallet (for tapping joints)
- Matching trim pieces / corner profiles
- Clean cloth
What you don't need: cement, sand, putty, furring strips, waterproof paint, or a sander.
2. Wall Preparation: Cover Old Walls Directly

The biggest time-saver with PS wall panels is this: you don't need to strip walls down to bare studs or re-level them.
Only two things to check:
- Is the wall reasonably flat?
- Small imperfections (3-5mm dips or bumps) are fine – the panel backing absorbs them. If a bump is too large, scrape it down.
- Is the wall dry, grease-free, and stable?
Remove old wallpaper (but don't worry about leftover glue). Latex paint surfaces are fine. Even ceramic tiles can be used as a base.
Conclusion: 90% of old walls can serve as a direct substrate, saving days of work and hundreds in labor costs.
3. Cutting Panels: A Utility Knife Is Enough

Even though PS panels are strong, cutting them is simple:
Measure your wall height/width and mark the cutting line on the back of the panel.
Score along the line with a utility knife 2-3 times (cut through the top layer).
Hold the panel on both sides of the score and snap upward – the panel breaks cleanly along the line.
For curves or cutouts (e.g., electrical outlets), use a jigsaw or fine-tooth hand saw.
Tip: Score from the back side – the front will have no rough edges.
4. Two Installation Methods: Nailing or Adhesive
Choose based on your wall type and preference.
Method A: Nailing (Recommended, Strongest)
Best for: Wood substrates, light steel studs, or any wall that accepts nails (for concrete, use steel pin nails).
Advantages: Instant hold, no drying time, removable for repairs.
How to: Align the panel and drive nails into the edge grooves or slots. The next panel covers the nail heads.
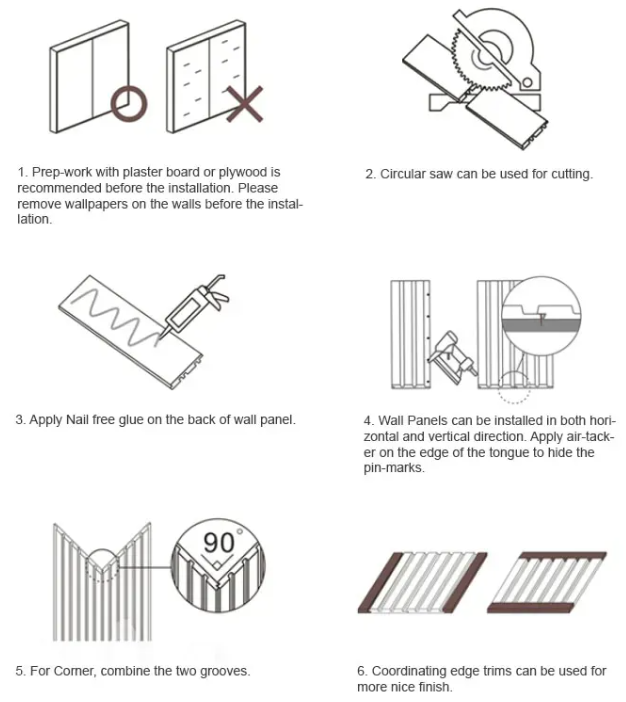
Method B: Adhesive (Quieter, Simpler)
Best for: Tile surfaces, smooth concrete, painted walls, or when you don't want to use a nail gun.
Advantages: No noise, minimal tools, one person can work slowly and carefully.
How to: Apply construction adhesive in an "S" or dot pattern on the back of the panel. Press onto the wall, level it, and temporarily tape or prop for 24 hours.
Note: Adhesive method works best for panels shorter than 2.4m, and the wall must be dry and grease-free.
5. Step-by-Step Installation: Left to Right, Bottom to Top
Using standard interlocking PS panels:
- Draw a reference line: Use a level to mark a horizontal line about 1cm above the floor (leave room for expansion – baseboard will cover it).
- Install the first panel: Start at the bottom left corner, aligning the bottom edge with your line. For nailing, use temporary spacers to lift the panel 1cm. For adhesive, apply directly.
- Lock the next panel: Align the groove of the second panel with the tongue of the first. Tap gently with a rubber mallet until the seam disappears.
- Work row by row: Check the level every few panels to keep straight.
- Finish the top row: Cut the last row of panels to fit (use the cutting method above). Cover the top gap with trim.
6. Inside/Outside Corners and Edges: Details Make Perfect
- Inside corners: Simply butt one panel into the corner, then overlap with the panel from the adjacent wall. Or use an inside corner trim.
- Outside corners: Wrap with a corner trim or L-shaped profile for a clean look and impact protection.
- Top and bottom: Use baseboards to cover the expansion gap and crown molding or trim to finish the top.
7. Cleaning and Final Check
Wipe away dust and debris with a dry cloth.
Check seams for flatness (fill tiny gaps with color-matched caulk if needed).
Make sure corner trims are secure.
Done! From old wall to new finish – often in half a day for one room, with almost no dust.
8.FAQ
Q: Where is your factory located?
A:Our company is located at No. 10-1 Lianhong Road, Yuanhua Town, Haining City, Zhejiang Province, China
Q: I've never done any renovation work. Can I still install PS panels myself?
A: Yes. Start with the adhesive method and lightweight PS panels. As long as you can use a utility knife and a level, you'll be fine. Try a small wall first (like a balcony or closet).
Q: Can I hang pictures or a TV on the panels after installation?
A: Yes. For nailed panels, drill through the panel into the original wall and use appropriate anchors. For glued panels, find studs behind the wall or use heavy-duty picture hangers designed for paneling.
Q: Can I remove the panels if I want to change the look later?
A: Yes. Nailed panels are removable one by one. Glued panels can be removed with heat or a scraper – the panels will likely be damaged, but the original wall can be cleaned.
Q: Can PS panels be used in a wet area like a shower?
A: PS panels themselves are waterproof. For direct spray areas, use specialized shower panels or seal all joints with waterproof caulk. Dry zones and semi-dry areas are completely fine.