English
 Español
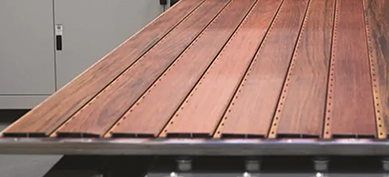
The allure of marble has long been associated with grandeur and elegance, but its weight, cost, and inflexibility have historically limited its application. The advent of the pvc uv marble sheet has revolutionized interior design, offering the classic beauty of stone with modern practicality. These sheets are celebrated for their lightweight properties, waterproof nature, and impressive durability. However, one of their most significant advantages, often overlooked, is their remarkable adaptability to non-flat surfaces.
Understanding the Material: Why Flexibility is Possible
Before delving into installation techniques, it is crucial to understand the inherent properties of a pvc uv marble sheet that make such applications feasible. Unlike rigid natural stone or heavy porcelain slabs, these panels are engineered from a polyvinyl chloride core. This material composition is fundamentally flexible pvc, allowing it to bend and conform to a variety of shapes without cracking or breaking. The “UV” component refers to a protective ultraviolet-cured coating that is applied to the surface. This coating does not significantly impede flexibility but is essential for providing the finish with scratch resistance, UV stability to prevent fading, and enhanced stain resistance.
The degree of flexibility is directly influenced by the sheet’s thickness. Standard sheets are available in various gauges, and for curved applications, selecting the appropriate thickness is the first critical step. Thinner sheets, typically in the range of 2mm to 3mm, offer the greatest pliability and are ideal for tighter curves with smaller radii. Thicker sheets, while potentially offering a more rigid feel, have a larger minimum bend radius and are better suited for gentle, sweeping curves or standard flat installations. Understanding this relationship between thickness and flexibility is the foundation for a successful project.
Pre-Installation: Planning and Surface Assessment
A successful installation on an irregular surface is won or lost during the preparation phase. Meticulous planning and assessment are non-negotiable.
1. Comprehensive Surface Evaluation: The first task is a thorough examination of the substrate. Whether it’s a curved wall, an arched niche, a column, or an undulating feature, the substrate must be structurally sound, clean, and stable. Any movement or instability in the underlying surface will telegraph through the installed panel and likely cause adhesive failure or damage. Check for loose material, dust, oil, or moisture. The substrate must be dry and within the recommended moisture content levels for the adhesive being used. For columns or complex shapes, creating a template from cardboard or craft paper is an highly recommended step to ensure precise panel sizing and minimize waste.
2. Selecting the Right Adhesive: The choice of adhesive is paramount. A standard wallpaper paste or weak glue will not suffice. For vertical and overhead applications on curves, a high-tack adhesive is required. Solvent-based contact adhesives or high-performance acrylic construction adhesives are often specified. These products provide an immediate strong bond, crucial for holding the panel in place on a non-vertical plane while it cures. It is essential to consult the technical data sheets of both the pvc uv marble sheet and the adhesive to ensure full compatibility, thereby preventing any chemical reaction that could damage the panel’s surface or backing.
3. Acclimatization of Materials: All materials, including the panels and adhesive, should be stored in the room where they will be installed for at least 24-48 hours before beginning work. This allows the materials to acclimatize to the room’s temperature and humidity, ensuring they are at their most workable state and reducing the risk of expansion or contraction after installation.
4. Tool Preparation: Gathering the correct tools beforehand ensures a smooth process. You will typically need:
- A utility knife with sharp blades and a cutting straightedge.
- A notched trowel (size as specified by the adhesive manufacturer).
- A rubber roller or a soft, flat squeegee.
- A measuring tape, level, and pencil.
- A heat gun (for cold-forming tighter curves).
- Safety equipment (gloves, eye protection).
Primary Installation Methods for Curved Surfaces
There are two predominant techniques for forming a pvc uv marble sheet to a curved substrate: the Score-and-Bend Method and the Heat-Forming Method. The choice between them depends on the tightness of the curve and the panel’s thickness.
Method 1: The Score-and-Bend Technique
This technique is primarily used for achieving convex (outward) curves, such as those on columns or rounded wall corners. It involves creating a series of precise, shallow cuts on the backside of the panel, allowing it to bend smoothly along the scored lines.
- Step 1: Calculate the Bend Radius: Determine the radius of the curve you need to cover. This will dictate the spacing and depth of your scores.
- Step 2: Scoring the Panel: On the reverse side of the panel, use a utility knife and a straightedge to make parallel, evenly spaced scores. The cuts should be deep enough to cut through the majority of the PVC backing but must stop just short of penetrating the top decorative layer. The closer the spacing between scores, the tighter the radius the panel can form. A common practice is to space scores approximately 10mm to 20mm apart for a standard column.
- Step 3: Applying Adhesive: Apply the recommended high-tack adhesive evenly to both the substrate and the back of the panel using a notched trowel. Allow the adhesive to become tacky as per the manufacturer’s instructions (often called “flashing off”).
- Step 4: Forming and Mounting: Carefully align the panel and begin pressing it onto the substrate. The pre-scored lines will allow the panel to bend cleanly and uniformly around the curve. Use a rubber roller immediately to apply firm, even pressure across the entire surface, working from the center outward to eliminate air bubbles and ensure full contact with the adhesive in every score channel.
Method 2: The Heat-Forming Technique
For more complex shapes, including concave (inward) curves or very tight radii, the application of heat is the most effective method. Heat softens the PVC material, temporarily increasing its pliability and allowing it to be molded to the desired shape without the need for scoring.
- Step 1: Pre-Dry Fitting: Always test-fit the panel without adhesive to understand how it needs to be manipulated.
- Step 2: Even Heating: Using a heat gun set to a medium temperature, gently and consistently wave the nozzle over the area of the panel that needs to bend. It is critical to keep the heat gun moving to avoid overheating any single spot, which can cause bubbling, discoloration, or permanent damage to the UV coating. The goal is to warm the panel uniformly until it becomes more flexible.
- Step 3: Molding the Panel: Once the panel is pliable, carefully and slowly bend it to match the contour of the substrate. It may be helpful to have a second person assist during this phase. You can hold it in place until it cools slightly and retains its shape.
- Step 4: Adhesive Application and Fixing: After the panel has been pre-formed and has cooled to hold its shape, apply adhesive to the substrate. Carefully position the pre-formed panel and press it into place. The use of temporary clamping or banding may be necessary for complex shapes until the adhesive fully cures. Roll thoroughly with a rubber roller.
For exceptionally challenging geometries, a combination of both light scoring and careful heat application may be employed.
Addressing Joints, Seams, and Finishing
On long curved surfaces, multiple panels will be required, making seam management important. Proper planning can make seams virtually disappear.
- Butt Joints: High-quality pvc uv marble sheet products often have finely milled edges designed for tight butt joints. When installing, ensure panels are pressed tightly together. The natural pattern of the marble design can be matched for a seamless look, much like wallpaper.
- Trimming and Cutting: All cutting should be done with a sharp utility knife. Score the surface deeply and then snap the panel backwards for a clean edge. For intricate cuts around obstacles, a slow, careful scoring process is best.
- Finishing: Once installed, seams and the entire surface should be firmly rolled again. Any adhesive residue should be cleaned off immediately with the recommended cleaner. Finally, a pass with a soft, damp cloth is sufficient to clean the surface, highlighting its easy maintenance characteristics.
Troubleshooting Common Challenges
Even with careful planning, challenges can arise.
- Springback: This occurs when a panel, especially when heat-formed, tries to return to its original flat shape. This is typically caused by insufficient curing time for the adhesive or not allowing the heat-formed panel to cool completely in its shaped position before releasing it. Using a high-tack adhesive designed for instant grab and providing adequate temporary support is the solution.
- Visible Seams: Gaps at seams can result from panels that are not properly butted together or from substrate irregularities. Ensuring the substrate is smooth and using consistent pressure during installation mitigates this.
- Adhesive Failure: Panels detaching are almost always a result of an improper substrate (dirty, dusty, or oily), the wrong type of adhesive, or the adhesive not being allowed to flash off correctly. Adherence to manufacturer guidelines for both the panel and adhesive is critical.